Options
Adding Product Options like size and color choices
Product Options are choices that customers must select to personalize a product during checkout. Examples are sizes and colors but you can create any options needed. To add options to your products follow these steps.
Creating the Options
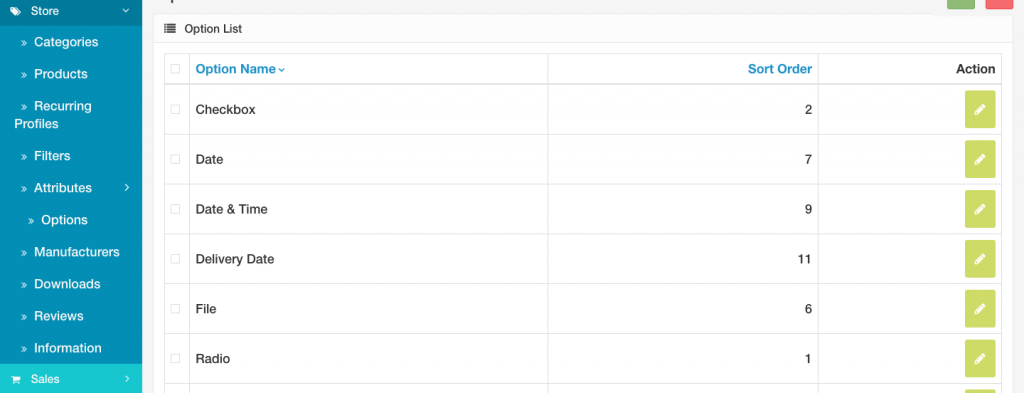
- Click Store in the left admin menu then Options and click green Insert button to add a new option or click the edit button next to an existing Option
- Enter an Option Name and select Type. The following types are available: radio button, checkbox, optional text field, a file upload, date, time, or date & time.
- Set Sort Order (if applicable.. for example if you have items that need both color and size choices and you want the color dropdown to show before the size dropdown on the product)
- Click the + Add Option Value button to add a value. For example if you were creating a size option here is where you would add the sizes S,M,LG, etc. Repeat until you have added all the values you need. You can come back and more later too.
Adding newly created Options to products
- To link options to the product navigate to Store then click Products and select the product you would like to add options for.
- Click Edit button to edit the product and select that product’s Option tab
- Begin typing the name of the option you created for this product, and a drop-down list will appear with all the options that match. (S, M, L, XL, etc.)
- Set Required to YES if you want customer to be forced to select an option, or NO to let them check out without choosing.
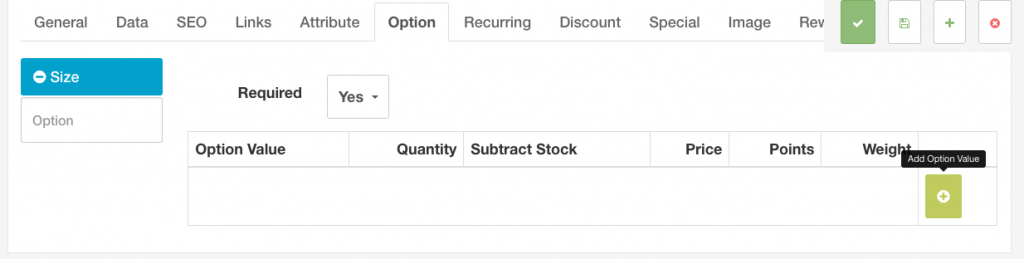
- Click the + Add Option Value button
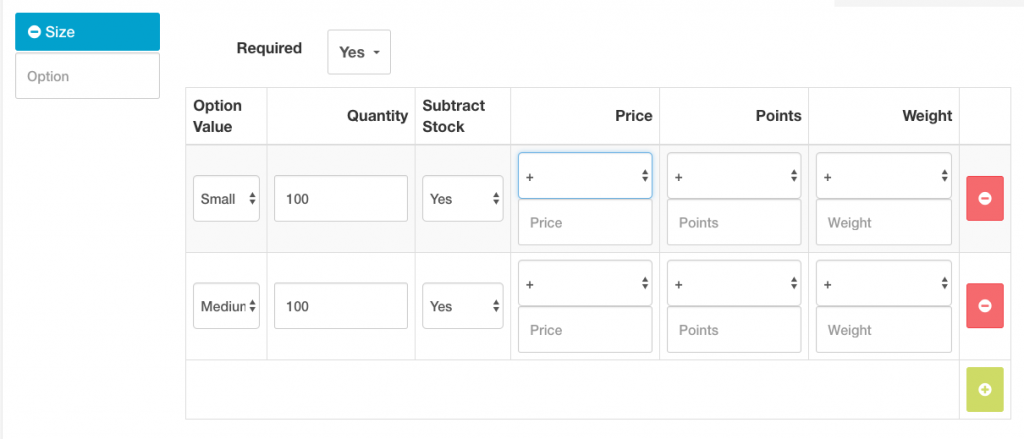
- Select option value from the Option Value drop-down menu
- If you are tracking stock, set the quantity of this option.
- If you wish to track stock levels of this item, set Subtract Stock to YES. Otherwise select NO.
- Price field – If you wish to charge extra (or less) for this product, enter the amount here. EXAMPLE: Men’s extra large t-shirts cost $2 more from the manufacturer. The “+$2.00″ will appear in the option box of your store.
- Points field – If you wish to give Reward Points for purchasing this option, which customers can redeem for additional merchandise, enter the number of points. Turn Reward Points On or Off in Extensions > Order Totals > Reward Points.
- Enter the weight of this option to Weight field if it is significantly heavier or lighter than the normal option to charge extra (or less) in shipping this option.
- Repeat the above steps for each Option Value
Press Save button in the upper right to save the changes
You should now see your newly added options on your product when you view your store.