Shipping
Understanding the best ways to ship your products is an important part of running your online store. You’ll need to decide what shipping methods you want to use, and then set up your store’s shipping so that your customers can choose a delivery method at checkout.
Manage all of our store’s shipping settings on the Shipping page in your Create A Shoppe admin by clicking Extensions then Shipping in the right admin menu. If you do not see the right menu click the gear icon in the right corner of your screen to open it.
Setup Free Shipping
Set free shipping on all orders over a certain dollar amount:
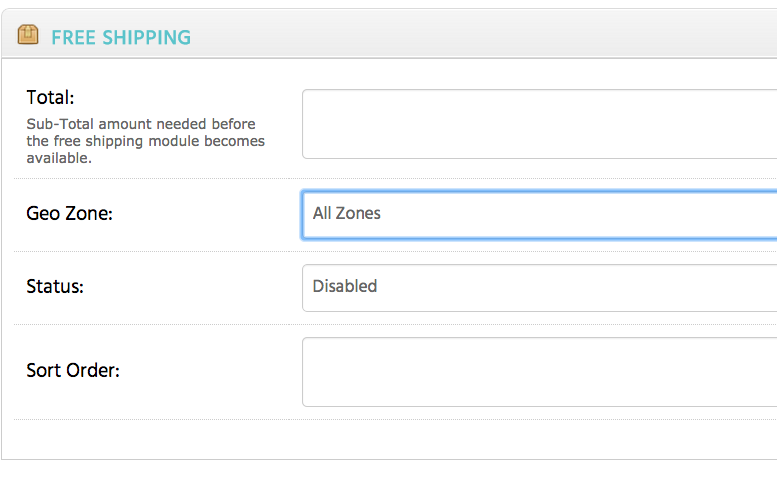
- Locate Free Shipping and click the edit button.
- Enter the total the order needs to reach before Free shipping is activated (example: Enter 100 if you are offering “Free shipping for orders over $100”)
- Select a Geo Zone (typically All Zones or United States only)
- Select Enabled
- Save your changes
Setup Flat Rate Shipping
Another way to charge for shipping is to offer a flat rate for every package
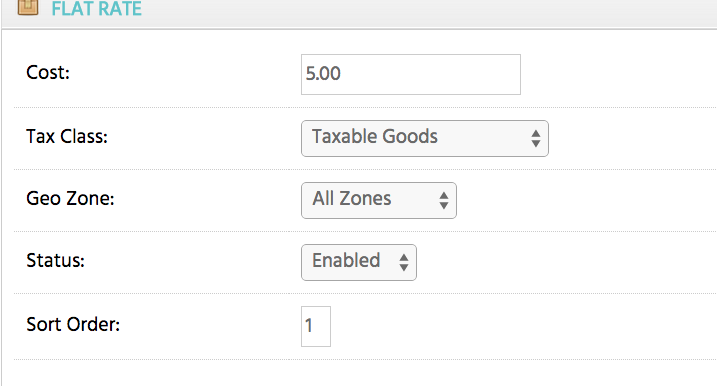
- Locate Flat Rate Shipping and click the edit button.
- Enter the cost
- Choose a tax class (typically Taxable Goods)
- Select a Geo Zone (typically All Zones or United States only)
- Select Enabled
- Save your changes
Setup Shipping Per Item
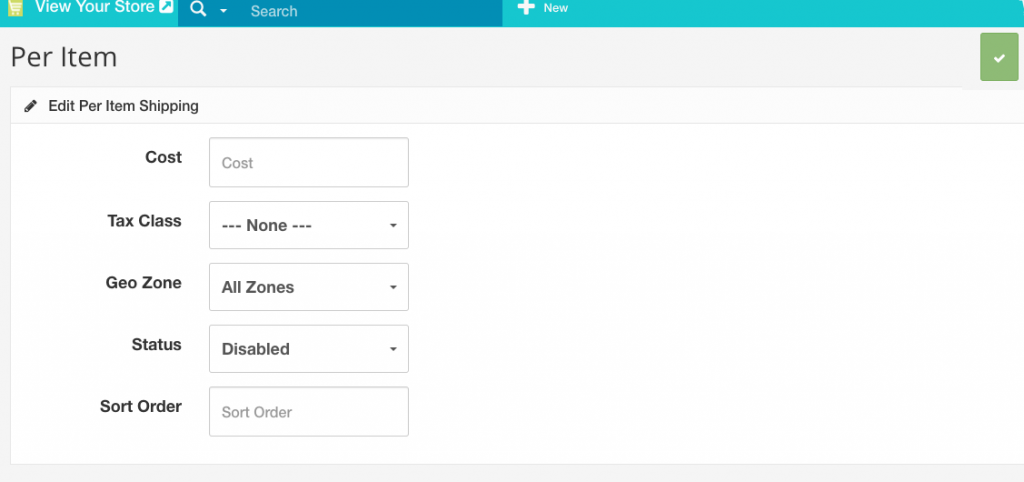
- Locate Per Item and click the edit button.
- Enter the cost (the amount you’d like to charge per item)
- Select a Tax Class (typically taxable goods)
- Select a Geo Zone (typically All Zones or United States only)
- Select Enabled
- Save your changes
This guide will show you how to set up your account with USPS account and then integrate your credentials to your store for.
Register for a USPS Web Tools Account
- Visit the USPS Web Tools registration page.
- Fill out the form as required
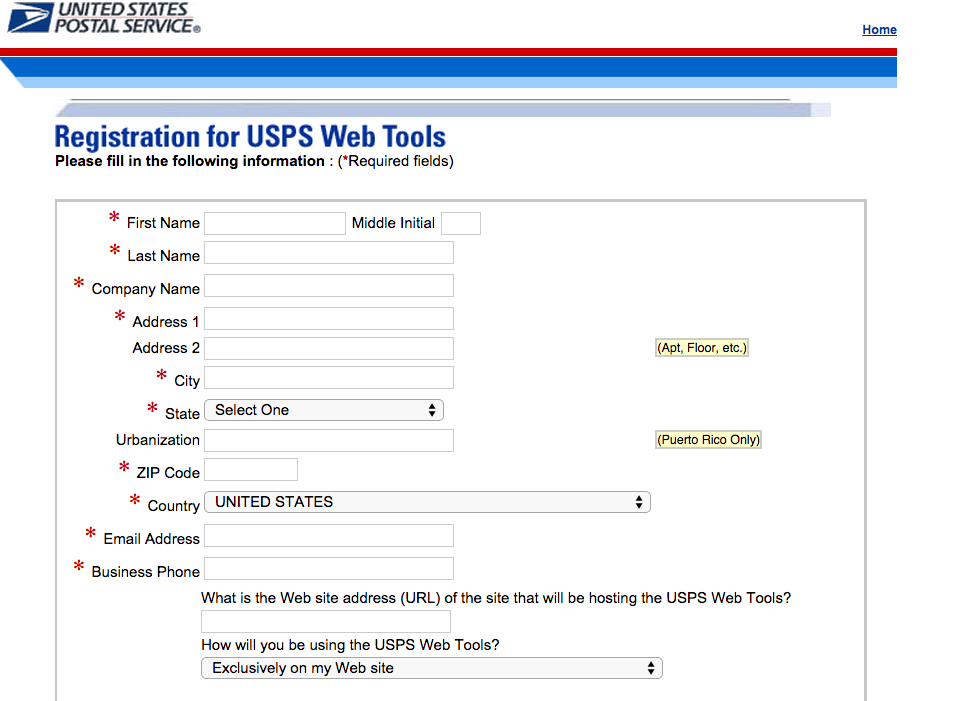
After you submit the form, USPS will create your API login account. You’ll receive an email with your API account credentials.
3. Call USPS at 1-800-344-7779 or email: uspstechsupport@esecurecare.net
4. Request that USPS update the account to use the production server. Provide them with your username (provided in registration notice) and let them know you are using a third-party ecommerce system.
Configure your store to use USPS tools
- Login to your admin and go to Extensions>Shipping
- If United States Postal Service (USPS) is not enabled click the edit button.
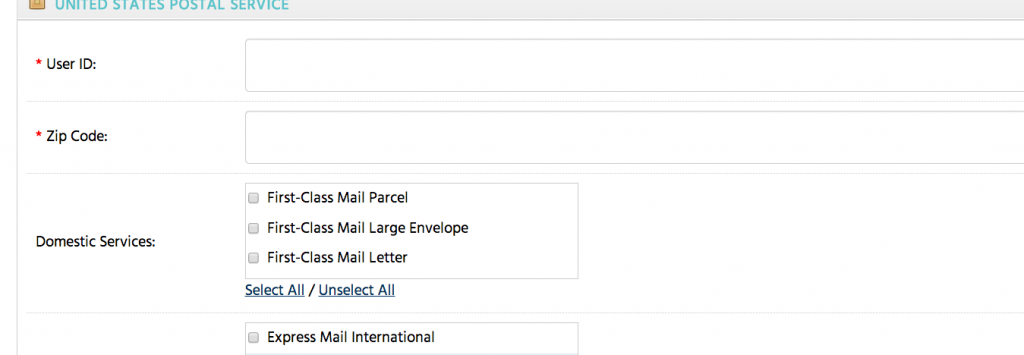
- In the User ID field enter the Username the USPS assigned in the registration notice email.
- Enter the Zip Code where the shipments will originate from (typically your home or store address).
- Select the Domestic & International services you plan to use.
- Set the Size, Container and choose Yes or No for machinable
- Enter the average size/dimensions of packages
- Choose if you would like to display the delivery time or not
- Choose if you would like to display the delivery weight
- Set Weight Class to Pound
- Choose a tax class (typically taxable goods)
- Choose a Geo Zone (typically All Zones)
- Set Status to Enabled
- If you have setup multiple shipping methods for a customer to choose from on checkout you can set the number for sort order that you’d like the shipping choices to appear in. Otherwise leave blank
- Leave Debug Mode set to disabled
- Save your settings
Configure your store to use Fedex
This guide assumes you’ve already created an account with Fedex
- Login to your admin and go to Extensions > Shipping (You’ll find extensions in your admin by clicking the gear icon in the far right corner of your screen to open the right side menu.)
- If UPS is not enabled click the edit button.
- Enter your key
- Enter your Password.
- Enter Account number
- Enter Meter number
- Enter your post/zip code
- Set test mode to yes or no depending on if you are ready to go live
- Select Quote type
- Select services
- Configure your measurements
- Select drop off type
- Select Packaging
- Set a rate type
- Choose if you want to display Delivery Time or delivery weight
- Set a weight class
- Choose a Tax class (typically taxable goods)
- Choose a Geo Zone (typically all zones)
- Set status to Enabled
- Save your settings
Configure your store to use UPS
This guide assumes you’ve already created an account with UPS
- Login to your admin and go to Extensions > Shipping (You’ll find extensions in your admin by clicking the gear icon in the far right corner of your screen to open the right side menu.)
- If UPS is not enabled click the edit button.
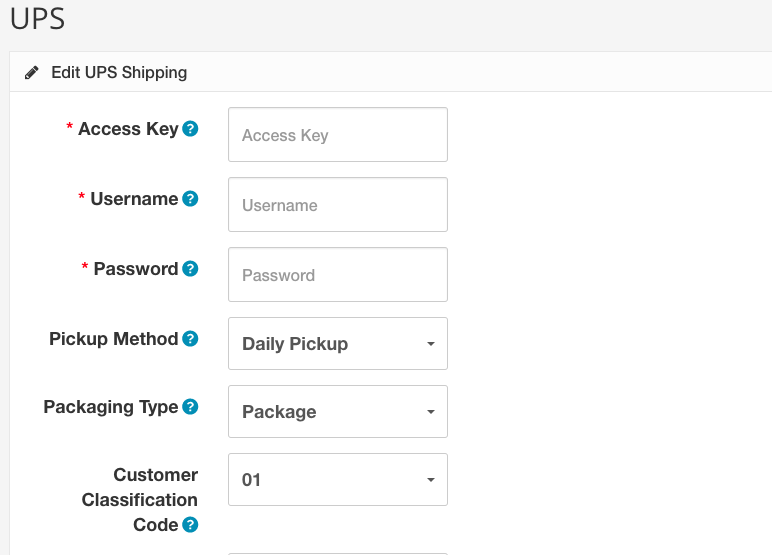
- Enter your access key
- Enter Username and Password.
- Choose a pickup method
- Select packaging type
- Select a Customer Classification Code
- Set Shipping Origin Code and enter origin state, country and zipcode
- Set test mode to yes or no depending on if you are ready to go live
- Select Quote type
- Choose services
- Set Enable insurance to Yes or NO
- Configure your measurements
- Choose a Tax class (typically taxable goods)
- Choose a Geo Zone (typically all zones)
- Set status to Enabled
- Leave debug mode to no
- Save your settings
Additional Shipping methods
Other available options for your store are Weight based shipping and Store pickup.