Email Templates
Email templates are the actual newsletters, emails or e-blasts that you will send out to your subscribers. You can create one template that you edit over and over when you want to send out a newsletter or you can create a new template for each and every newsletter that you send out. You can create templates ahead of time and save them for future mailings or create one and send it out right away.
Creating and Managing Email templates
To create a new Email Template (Newsletter or e-blast) first click Newsletter then Email Templates. Next click the Add New button (yellow plus sign button in upper right corner)
STEPS:
On the Add Template tab
- Enter a Sort Order (this can be 0 or blank) It is not seen by the subscriber and is for your records only.
- In the Email Template Title box give your newsletter a title. This identifies the newsletter for your records but it will also be the subject line that subscriber sees when they receive the email.
- Description: The description area is where you’ll add all of the photos and information that you want to include in your email. Short codes make it quick and easy to include important information in your email templates. Available Short codes are displayed to the right of the description box for quick reference.
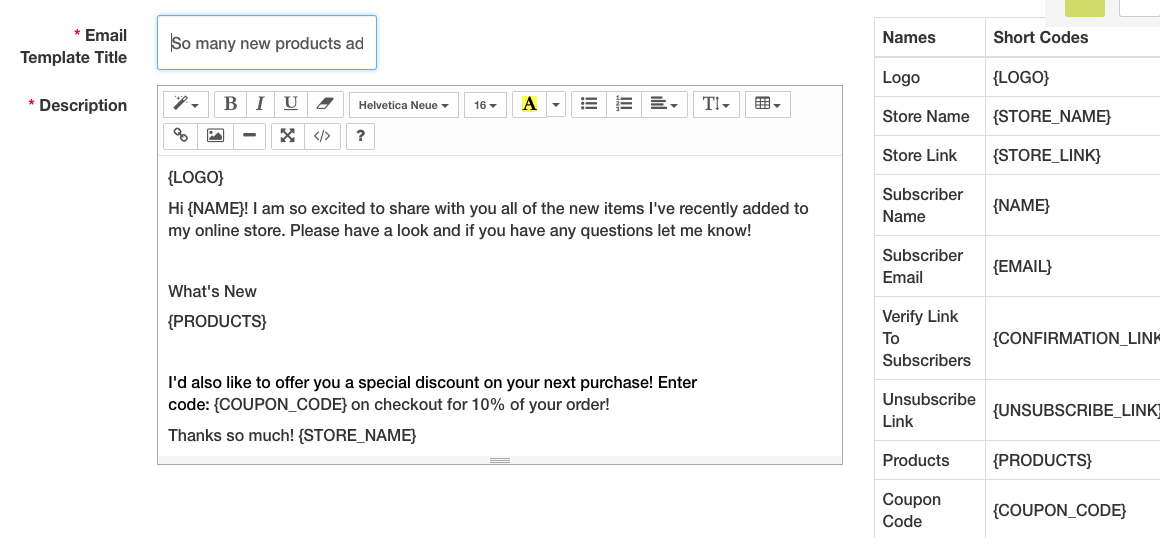
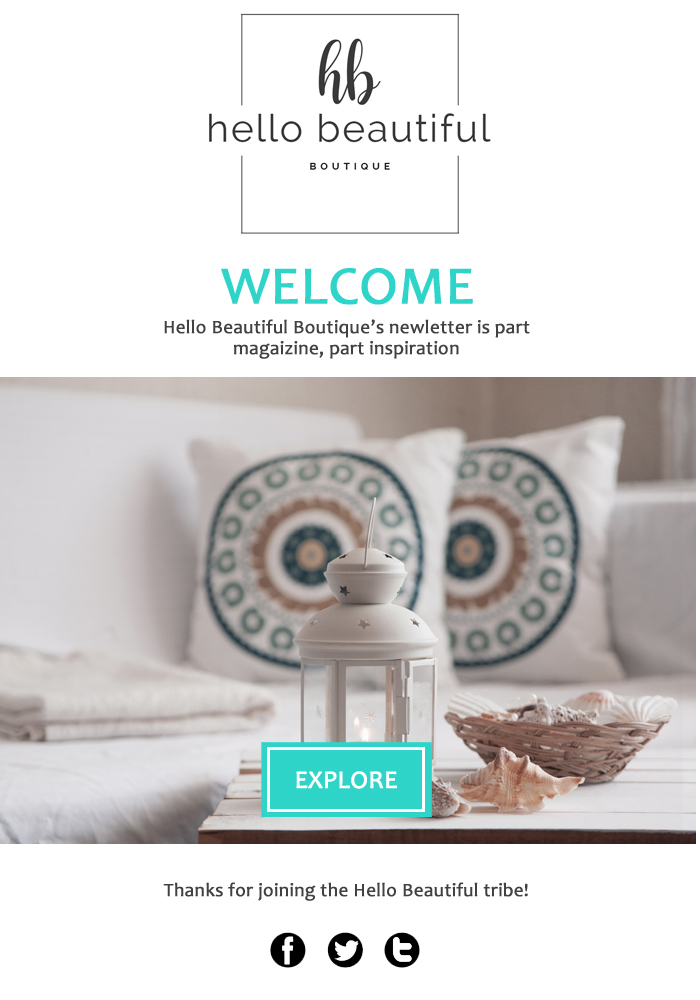
In the example above we used the Logo short code. This will automatically display our store logo at the top of the newsletter/email. The Products short code will display the products we assign under Assign Products Tab, etc.
On the Assign Products tab
If you chose to include the Products Short Code in your email description then you’ll probably want to choose the products you’d like displayed.
- In the Assign Products box start typing the name of the item(s) that you want to include and click each one as it pops up. You can included as many as you’d like.
- For the Image Size you’ll want to enter a width and height that works with the majority of your product photos sizes. If many of your photos are 300×250 you’ll enter dimensions close to that size.
- Show Price: Choose Yes or No to show products prices or not with the photos.
On the Assign Coupon tab
To include a coupon in your newsletter choose your Coupon from the Assign A Coupon drop down under the Assign Coupon Tab. You must create the coupins first under Marketing > Coupons in order for it to be available in the drop down to add to your newsletter,
Save your Email Template
Save all of your changes by clicking the Save button in the upper right corner of the screen. Your new email template is now ready to use for your next mailing. See Quick Email for how to send your newsletter out to your subscribers or to test your newsletter by sending it to yourself.